
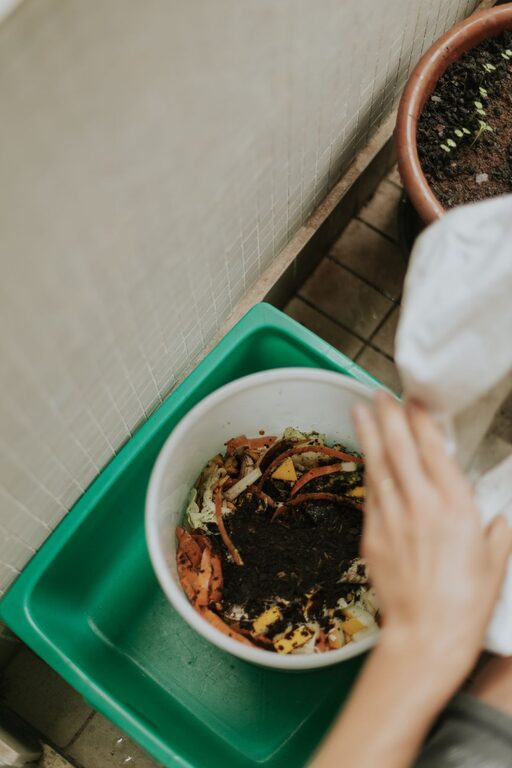
Beginner Tips for Composting at Home
Composting is a simple way to turn everyday food scraps and yard waste into a useful soil amendment. Instead of sending organic materials to the trash, you can reuse them to support gardens, houseplants, trees, and outdoor containers.
Starting a compost pile may seem complicated, but the basic process is easy. With the right balance of materials, moisture, air, and time, you can make compost in a backyard, on a balcony, or even in a small indoor container.
What Is Compost?
Compost is organic material that has broken down into a dark, crumbly substance. Natural organisms, including bacteria, fungi, and small insects, help decompose food scraps, leaves, grass, and other plant materials.
Finished compost usually has an earthy smell and a loose texture. It can be mixed into garden soil, spread around plants, or added to containers. Compost improves soil structure and helps it hold moisture without becoming overly compact.
Choose the Right Composting Method
The best composting method depends on your available space, the amount of organic waste you produce, and how much time you want to spend maintaining the pile.
Backyard composting
A backyard compost pile or bin is a good option if you have outdoor space. You can build a simple pile, use a purchased bin, or create a contained area with wire fencing or wooden boards.
Backyard composting works well for a mix of kitchen scraps and yard waste. It can handle larger amounts of material than indoor methods, but it does require occasional turning and monitoring.
Tumbler composting
A compost tumbler is a sealed container that rotates on a frame. Tumblers are tidy and easy to turn, making them useful for small yards. They may produce compost more quickly than an unmanaged pile, although they can become too wet or too dry if the balance of materials is not maintained.
Indoor composting
If you live in an apartment or do not have outdoor space, consider a small countertop collection container. This container does not usually create finished compost on its own, but it can store scraps until you take them to a community composting program or an outdoor bin.
Worm composting, also called vermicomposting, is another indoor option. Special composting worms process food scraps in a ventilated container. This method requires a little more attention but works well in small spaces.
Learn the Two Main Types of Materials
A healthy compost pile needs a balance of “green” and “brown” materials.
Green materials
Green materials are generally moist and rich in nitrogen. They help provide energy for the organisms that break down the pile.
Common green materials include:
– Fruit and vegetable scraps
– Coffee grounds and paper coffee filters
– Tea leaves and unbleached tea bags
– Fresh grass clippings
– Young weeds without seeds
– Fresh plant trimmings
Brown materials
Brown materials are usually dry and rich in carbon. They add structure and help air move through the pile.
Common brown materials include:
– Dry leaves
– Small twigs
– Untreated wood chips
– Shredded plain paper
– Plain cardboard
– Paper egg cartons
– Straw
A useful starting point is to add about two or three parts brown materials for every one part green material by volume. You do not need to measure precisely. If the pile smells unpleasant or looks wet, add more browns. If it is dry and barely breaking down, add more greens and a little water.
What You Can Add
Many common plant-based materials can go into a home compost pile. Cut large pieces into smaller pieces when possible. Smaller pieces provide more surface area for decomposition and usually break down faster.
Good additions include:
– Vegetable and fruit scraps
– Peels and cores
– Coffee grounds
– Loose tea leaves
– Crushed eggshells
– Dry leaves
– Grass clippings in small amounts
– Non glossy paper
– Plain cardboard
– Wilted flowers
– Plant trimmings
– Small amounts of sawdust from untreated wood
Remove stickers from produce before composting. They do not break down easily and can remain in finished compost.
What to Keep Out
Some materials can attract pests, create odors, or introduce unwanted substances into your compost. For a simple home system, avoid adding:
– Meat, fish, and bones
– Dairy products
– Greasy or oily foods
– Pet waste
– Diseased plants
– Weeds carrying mature seeds
– Glossy or coated paper
– Coal or charcoal ash
– Treated or painted wood
– Synthetic materials
– Large branches
Some advanced composting systems can process materials such as meat or pet waste, but these systems require careful temperature control and special handling. Beginners should keep the compost pile focused on plant-based materials.
Build Your Compost Pile in Layers
Start with a layer of coarse brown material, such as small twigs or dry leaves. This helps air enter from the bottom. Add a layer of green material, followed by a thicker layer of brown material.
Continue adding materials as they become available. Cover fresh food scraps with brown materials each time. This helps reduce odors and discourages insects.
Try to keep the pile at least three feet wide, long, and tall if possible. A pile that is too small may not retain enough heat and moisture to break down efficiently. If you have limited space, a smaller bin can still work, but decomposition may take longer.
Maintain the Right Moisture and Air
A compost pile should feel about as damp as a wrung-out sponge. If the material is very dry, add water gradually while mixing it. If it is soggy, add dry leaves, shredded cardboard, or other brown materials.
Air is also important. Without enough oxygen, the pile may develop a strong odor and break down slowly. Turn the compost with a garden fork or compost aerator every week or two. Mixing the outer material into the center helps distribute moisture and air.
You do not need to turn the pile every day. Regular, occasional mixing is enough for most beginner compost systems.
How to Tell When Compost Is Finished
Compost may take several months to finish, depending on the materials, weather, pile size, and maintenance. Finished compost is usually:
– Dark brown or nearly black
– Loose and crumbly
– Pleasantly earthy in smell
– Difficult to identify by its original ingredients
Some larger items, such as eggshell pieces, twigs, or avocado skins, may remain. You can remove them or return them to the pile for more time.
Let finished compost rest for a short period before using it around plants. This gives the material time to stabilize.
Common Composting Problems
Bad smells
A strong rotten or sour smell often means the pile is too wet or lacks air. Add dry brown materials and turn the pile thoroughly.
The pile is not breaking down
The pile may be too dry, too small, or made mostly of brown materials. Add a small amount of green material, moisten it, and mix the contents.
Fruit flies or other insects
Bury food scraps in the center of the pile and cover them with dry leaves or shredded cardboard. Keeping the bin covered can also help.
Too many grass clippings
Thick layers of fresh grass can become compacted and slimy. Mix grass clippings with dry leaves, shredded paper, or small twigs before adding them.
Use Your Finished Compost
Finished compost can be mixed into garden soil before planting, added to raised beds, or spread in a thin layer around established plants. For containers, mix a modest amount with potting soil rather than using compost alone.
A simple compost routine is all you need to begin: collect suitable scraps, balance them with dry materials, keep the pile slightly damp, and provide occasional air. With practice, composting becomes an easy household habit that reduces waste and gives your plants a natural boost.
